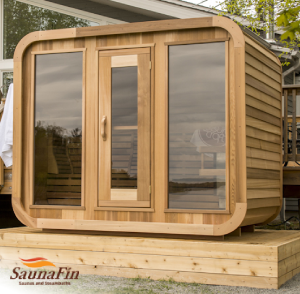
How to Build an Outdoor Sauna

Outdoor saunas are a relaxing and healthy way to relieve stress and an attractive addition to any home. In recent years, outdoor saunas have become very popular for many homeowners. They are easy to build, especially if you have purchased an outdoor sauna kit. They are great way to improve one’s physical and mental well being. If you are planning to build an outdoor sauna, there are just a few simple steps you have to follow, and in a few hours you will have your very own sauna to enjoy.
Steps for Building an Outdoor Sauna:
1. You first have to select where you want to build the sauna. You need to have a strong foundation for the sauna to rest on. Once you have prepared the area and poured the concrete, you can begin to build.
2. Before you start to build, you will need to have a construction plan. There will be one with a sauna kit, or you can obtain a plan online or in books and magazines.
3. You will need your construction materials. Cedar is an attractive and durable wood for interior and exterior walls. Make sure you buy the appropriate size wood for the size of the sauna you will be building. You need to determine the size so you can buy enough wood and other building materials.
4. Cut the wood and planks according the specifications that you will need based on your construction plans. You will also want to apply a water seal on the exterior wood once the sauna has been built.
5. You will want to build the floor first. Start by building the floor frame. Make sure you have nailed it together so it is strong. Once you have the frame constructed, nail the cedar planks to make the floor.
6. You will now want to build the frames for the roof and walls. You do this the same way as building the floor frame. Nail the wall frame to the floor and then nail the planks to the wall frame and floor. Lay insulation over the walls. On the interior, cover the wall and insulation with cedar wood planks. Make sure you have used plenty of nails and everything is secure and air and moisture tight.
7. Now it is time to complete the roof. Use cedar wood planks and follow your blue prints. You can then add shingles to the roof once the roof is complete. It is essential to make sure the roof has been nailed tight and is secure. You can then build a bench seat and install it inside the sauna.
8. Depending on the type of sauna heater you have purchased, install it by following the instruction manual that would have come with the sauna heater.
There are a number of different types and styles of pre-fab saunas and sauna material kits available. Whether it is for your health or just for relaxing, saunas make a great addition to the home.
